Your Life Light 3.0 by default acts as an wifi access point, meaning you do not need to connect it to the Internet to use it. You do have the option, however, of connecting your Life Light 3.0 to your local wifi network. This allows any other device that is also connected to your wifi network to be able to easily access and control your Life Light 3.0. Here are the steps on how to connect your Life Light 3.0 to your local wifi network:
First, connect to your Life Light 3.0 as usual:
Second, go to your browser and go to 192.168.4.1 and click on “settings”
Third, select the network you want to connect to.
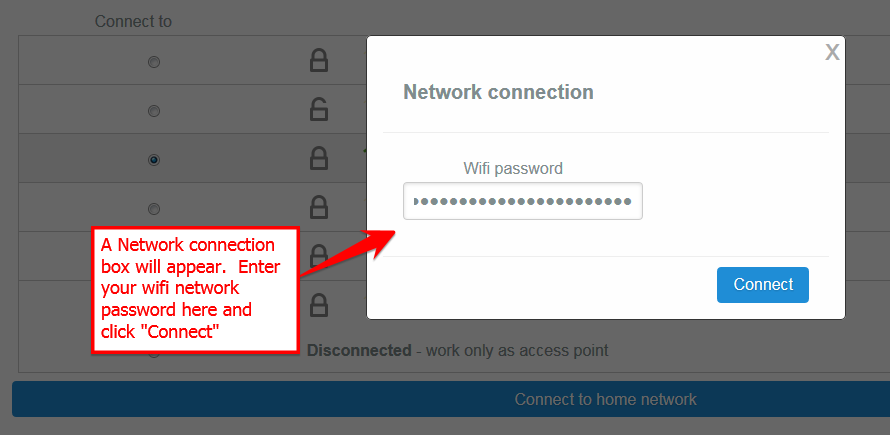
Put in your wifi network password
Next, a Network connection status will appear. Once connected this should disappear, if it does not then wait 60 seconds can refresh the page.
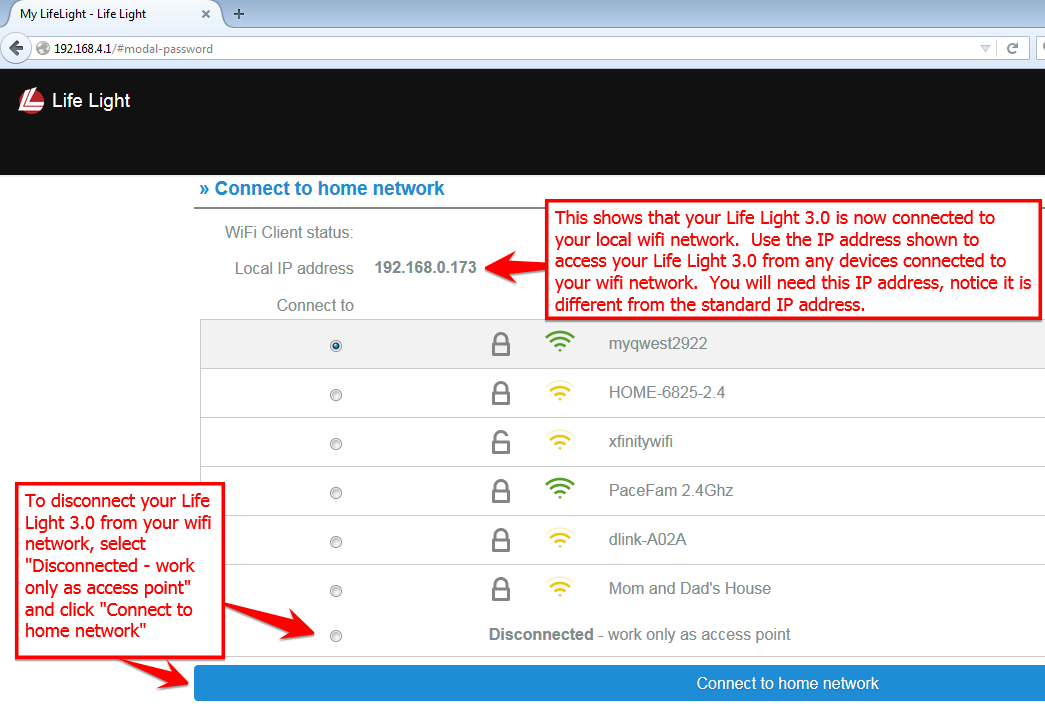
You will either still be on the Settings page, or go back to the Settings page. You will see a screen that shows the Local IP address. This is the IP address you will use to access your Life Light 3.0 device from any other devices you have connected to the same wifi network. Notice this IP address is different from the one you normally use the access your Life Light 3.0. Multiple devices can be connected to your Life Light 3.0 at the same time.
This is also where you can disconnect your Life Light 3.0 from the wifi network if you choose to in the future. Simply choose “disconnected” and “Connect to home network” and this will “connect” your Life Light 3.0 back to the default setting of acting as an access point.
From any other device connected to your wifi network, open the browser and type in the IP address from the previous step. You do not need to go to your wifi setting to connect to the Life Light SSID/wifi network, because the Life Light 3.0 is already connected to your wifi network.


